These Pergola Plans Really Are For Beginners!
by Rob Lipparelli
(Japan)

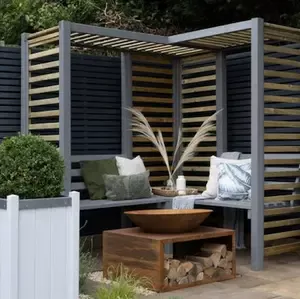
Hexagonal Pergola Built from the Plans


|

|
So when my wife came back from the garden center and asked if I could build a pergola for the garden, I said “Sure, no problem, when the weather gets a bit better”, thereby allowing me time to look on the net and to see what a pergola was!!
Having no idea what to do, and not having any tools or having done any woodwork in 35 years, I needed something that was going to look special, and at the same time, simple to construct. So when I found Di Turnbull's pergolaplans4free.co.uk website and her hexagonal pergola, it was like manna from heaven. I don't have any tools, and have no idea how to safely use any of the power tools listed to complete the pergola, but close to my home is a garden center where you can hire jigsaws/drills/ cutters etc for the day. So my first step was to spend 1/2 a day just getting a feel for the equipment and learning from any mistakes.
It took me just over a week to complete, partly due to the weather. If you can find someone to help, things will certainly get done quicker. Just holding posts, drilling holes and sanding, whilst you are on the next step, will save a lot of time and you could complete it in a weekend. If working by yourself, that's fine, and that sense of achievement will give you a buzz for a long time, so certainly worth the extra toll, and you might even lose some weight like me; I lost 1/2 a stone...woohoo....!!
So, having purchased the weather treated posts, my first day was spent treating it again. I gave it 3 coats. I used Di's 3 by 3 / 2 by 4 timber plan and template no. 16 for the rafter ends.....All set to plant the posts, I encountered my first problem!
We have many large trees in the garden and whilst digging the post holes, I would hit the roots. In the end, I made a slight change in the dimensions, which would obviously mean having to use different length sized cut wood for the rafters. To the naked eye, its unnoticeable, but if you were to get out a tape measure, you will see that 2 of the posts are an inch further away/closer to the others. I live in Japan where earthquakes and typhoons are the norm , so I made the post holes 1 meter deep...1 post is only 70cm deep, which meant trimming the post. I decided to take this route rather than try to realign all the holes.
Filling with a couple of inches of gravel first, I placed the poles in quick drying cement. The post level enabled me to make sure it was plumb. Instead of worrying it would move about in the cement, I then clamped a piece of wood to the post and clamped it to a stake in the ground to secure it and allow me to get on with the next post...When the second post was put into the concrete, I then placed a rafter along the top of the two posts, to make sure they were level (as per building plans).
Working clockwise, after the first 3 posts had been planted, I used one of the longer roof rafters as a measuring stick to check post no. 4 would be directly in line and the correct distance away from pole no. 1. This was repeated with post no. 2 and 5, and post no. 3 and 6...( hopefully that makes sense). Connecting each post with a rafter was fairly straightforward, measuring under the wood and cutting to size. (This is where a second pair of hands would have been very useful, to hold the wood steady!) I clamped the rafter to the posts at each end, to avoid it slipping when drilling holes through it.
I interchanged the drill bits, rather than use 2 drills, but they do get very hot so wear a protective glove. If you are in the UK, not an issue, but for others, beware of the mosquitoes. As I was putting a rafter into place, a mosquito went up my nose, causing a jerk reaction. I came flying off the ladder and landed on some rocks next to the pergola. To add insult to injury, the timber I was holding came crashing down on my head. Wify was laughing so much, I thought she would lay an egg. I was in so much pain but couldn't help laughing too!
I was so pleased with the results of cutting the rafter tails with the jigsaw, having used Di's template. I hadn't used a jigsaw before , but when stacked together and looking down, it looked as if there was only 1 rafter...I then sanded the edges of the tails to give it a curved finish...
Important to note here..maybe obvious to some of you and depending on where you mark the timber, but for a novice like me its worth mentioning. For the rafters connecting the frame, I cut just outside the marked lines and then sanded down to ensure a snug fit..With the roof, for the notching, I cut just inside the lines and then sanded down. Would you believe my printer went on the blink, so I couldn't use the templates for the smaller rafters to connect to the main frame rafters, so I measured and cut each one individually. Miraculously, all the rafters, except for 1, fitted perfectly and held firm by themselves...
...and then the rain came pouring down! For 2 days, I just left it there without drilling a screw into any of the roof supports. I have a big blue tarpaulin, so it allowed me to paint/seal the rafters as the rain came down. When I finally drilled the smaller rafters to the main frames, I realised I had made a small mistake. I had drilled too far away from the center of the pergola, so even if I did use the finial template, the screws would be showing. In the end, I just drew my own hexagon, making it 30cm at its widest point. (Still looks good though.)
I couldn't believe how hard it was to find a finial here in Japan. Shop staff looked at me as if I was mad. I could have ordered one online from the UK, but with shipping costs, it would have been quiet expensive. Plan B, In the end, I found a garden pot, which I then sprayed with a colour as close as possible to the pergola.
Because of the mosquitos, the pergola's main focus is for plants and grape vines. Next project will be to add a trellis, when I can. If you are looking to design the same and use as a seating/dining area, it may be better to have slightly larger dimensions. When making the circle, before you start digging, you can have a friend help put some furniture inside to see how it all fits.
I tried to make this explanation short and sweet. I hope it was at least sweet enough! For a slightly shorter 'tongue in cheek' version, please click here. Thank you for reading..
Robert.
Comments for These Pergola Plans Really Are For Beginners!
|
||
|
||
|
||
|
||
Recent Articles
-
They're Coming In Thick and Fast This Weekend!
Apr 12, 26 08:29 AM
Even more discounts to savour, this time for trees, with the original 20% off and now another 15% off. If you're looking for a perfectly placed tree this season either to plant in the ground or in a p… -
Fantastic Pergola Offers
Apr 11, 26 10:44 AM
 Exploring fantastic pergola offers, garden bargains and exclusive voucher codes can mean big savings and there are some great ones this month! Take a look.....
 -
Pergola Posts
Jan 17, 26 09:55 AM
 Let's look at some ideas for your pergola posts - post size, post anchors, using rough sawn or planed timber, and trending pergola paint colours.
 Subscribe To My Blog Posts


Advertising Links
This page may contain advertising links earning a small commission, at no extra cost to you. It is my hope these links will help you to make informed and creative choices.
Love Gardening! Ezine
Join the 'Love Gardening!' Ezine and receive garden and landscaping tips, exclusive voucher codes and updates to the website. More...
Recently Released

Pitched Roof Hexagonal Pergola
Other
Pergola Plans

Free Simple Pergola Plans

Attached Lean-to Pergola

Free Raised Bed Plans

Corner Pergola

Hexagonal Pergola

Asian Pergola

Seated Arbour
"The plans were great, very concise, easy to follow and I couldn't have managed without them!" T.
“Well done for a really useful site!” Mike.
Love the templates for the Rafter Tails! Using Design #5. Thanks so much." Laura.
"I love your website! Your entire site is incredible. I was able to get ideas for my pergola, which looks fantastic." Wayne.
Great service. Now all I have to do is build it! Martin.
"Your plans look amazingly comprehensive. I see you are intending putting the plans for the corner pergola on this fabulous site. Could you please tell me when the corner pergola plans will be available to purchase...yours is the nicest design I have seen!" Michelle.
Plants and Seed Offers
Pergola Kit and Accessories Offers

£340 off


Sales & Offers
Beautiful 'Gainsborough' gazebo
Save £204!

See my 'Fantastic Offers' page for more bargains on pergola kits, tools and all things gardening!