Triangular Pergola Design
Adapted from the Corner Pergola Plans

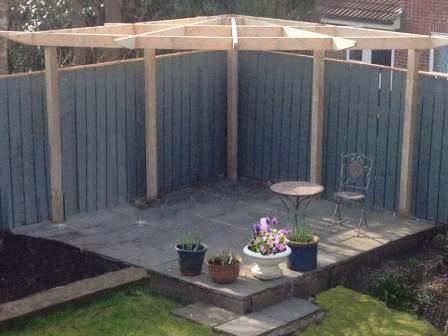
This fabulous triangular pergola was built by Ray. We adapted the corner pergola plans to achieve the perfect pergola for his deck.
I'm going to show you how to do this. You will need to have read through the corner pergola plans, so that you can see how the posts and rafters are constructed.
The triangular pergola is, in fact, easier to build than the original but, nevertheless, there are a few things you need to take into account.
Here is the original design shown against the adapted one.
 |
|
The original design has two side sections with two extra posts. There are very good reasons for this:
- It shortens the diagonal rafter running across the front entrance.
- It creates more space within the footprint.
However, there are times when this may not be possible, as with Ray's pergola set around his decking patio, or it may be that you simply prefer a triangular design.
Here are some quick modifications to make the triangular pergola yourself.
I have used relevant parts of my emails to Ray to explain how to do this.
Ray:
I have been reviewing
the corner pergola plans I purchased from
you and have a question. Could I build the pergola without
posts 6 and 7, making it into a triangular pergola?
It is to fit
over some decking I am installing, so posts 6 and 7
would encroach onto the decking. I am likely to use similar
dimensions to your standard plans i.e. 8" 9' sides.
So:
1. Would it just be a matter of extending the 2 main side rafters to accommodate the longer front diagonal rafter?
2. Would the diagonal rafter at the
front sag even if using 6" X 2"?
3. If it might sag, should I add another
diagonal rafter just in front
of posts 2 and 4?
4. And how high off the ground do you
usually make the pergola
(ground to bottom of the rafter dimension)
The Triangular Pergola Footprint
Di:
You could do this
quite easily with just a few adjustments. I
have attached some diagrams to illustrate the points. I wanted
to
get this back to you quickly, so hope the diagram is ok!
I will answer your questions as per your numbered list.
1. Yes, you could extend the main rafter lengths, or just leave
them as they are and run the diagonal across, although this would
cut down the seating area. I would mark it out and see what you
think.
You could extend the distance between posts 1 > 3 and 1>5 to
10' 9", which would add an extra 2ft to the main rafter lengths of your triangular pergola, thereby fitting four 5ft trellis panels; two on each side.
If you are not using trellis, you can have it any size you wish, although the length of the diagonal rafter will restrict this.
I think you will need 2 more radiating rafters to fill in the spaces where the side rafters were.

Notching the Posts
Because the diagonal rafter will lie across the apex of the
posts, I would notch the corner of the post by measuring 6" down (for a 6" deep rafter), and the depth of your rafter in, so that the diagonal sits on the top of the post.
Also, because the diagonal rafter will be at quite an acute angle to the main rafter, I would consider doing away with the rafter tail on the diagonal rafter, as too many rafter tails too close together can look messy.
Either method, notched or un-notched, can be used to attach the diagonal rafter to the post. I prefer the notched method, both for neatness and strength. Half of the post is cut away, on the diagonal, to the depth of the rafter, which then sits snugly onto the post.
 |
 |
To do this, lay the diagonal rafter across the main rafters, mark, cut to length and notch.
Here, again, I have shown both methods.

2. and 3. The length of the diagonal rafter will be quite long.
Using 6" x 2" timber will give it more strength, but I would do as you suggest and add another diagonal between posts 2 and 4 (see 1st diagram above), notching the posts and cutting the rafter ends as before. This will take a lot of the weight off the front diagonal rafter. It’s a bit more work notching, but better to be safe than saggy!
4. Pergolas usually stand between 7.5' and 9' high.
The one in the picture was concreted in 2' with 8' above ground.
I hope this helps Ray, but if you do have further questions or need more clarification, feel free to ask and we'll take it from there.
Hi Di,
Thanks again - all clear now - and thanks for the diagrams.
All going well. Installing decking at the same time as the triangular pergola, so I am as far as putting up the five main posts (Met Posts were a pain!) - and tomorrow I will be attaching the trellis (done things in a slightly different order!)
Just struck me, do you need planning permission for a pergola? I
know you do for decking over a certain height?
Ray
Hi Ray,
That's great!
Yes, Metposts can be tricky. Did they twist as you were hitting them in?
Let me know how you get on with the trellis panels. As long as your measurements are accurate, you should be fine.
As for planning permission, it shouldn't be necessary for a structure of this size, especially if it is at the back of the house: that is for the UK anyway. I think they are a little stricter on planning laws in the US.
This is a useful page, which has an interactive, visual method of helping home owners decide if they need planning permission.
Keep me posted. It's good to hear how you are doing during the project!
Hi Di,
Yes the Met Posts twisted and became 'locked' when they hit large
pebbles and other hard lumps of stuff - and I did put them in using lots
of small hits rather than acting like a fair ground test your
strength man!
As far as advice goes then:
1. Use a post as a lever/see-saw if one gets stuck to get it out
2. Try only twice - then revert to plan B - cutting off a length and
digging a hole where the post has come from - then use Post Crete as
a really quick way of concreting in.
3. Use a pilot hole method (just found on Met Post web site) using an iron rod to make the pilot hole (did not try this)
4. Rather than trying to hold the trellis to get the right distance
between posts (I have used heavy trellis and was working on my own!), cut
a length of 2" X 2" to the width of the trellis and use
this at post level to keep checking the width as the post goes
in
These may help?
Hi Ray,
Metposts, or post anchors as they are sometimes called, are fine if the soil is good. I use different methods for installing the posts, depending on individual circumstances. The main advantage is that they protect the posts from rotting and will last for many years.
I've included some advice in 'Adapting the Plans'
The Finished Triangular Pergola
So you did it! Well done. Doesn't it look fantastic. Very impressed. Looks lovely with the decking in front. I see what you mean about it needing to be a triangular pergola.
It looks as if you mounted the diagonal in front of the post.
The wood looks great. Did you use planed?
I bet you feel really proud!! I'm glad it all worked out so well!
Di.
Hi Di,
Thanks for the compliments - yes I do feel proud of my efforts.
Thanks for all your advice (and plans)
The wood is just as it comes but stained with Cuprinol (2 coats) – and yes, I fixed in front of the post and screwed through into the post as you suggested.
I also changed my mind about the extra diagonal - it did not seem to need it.
And please do use the picture of my triangular pergola on your web site (that would be great) and I am happy for you to use my name if you like - or provide any other support to people if needed - albeit on the basis of building the one pergola!
Ray
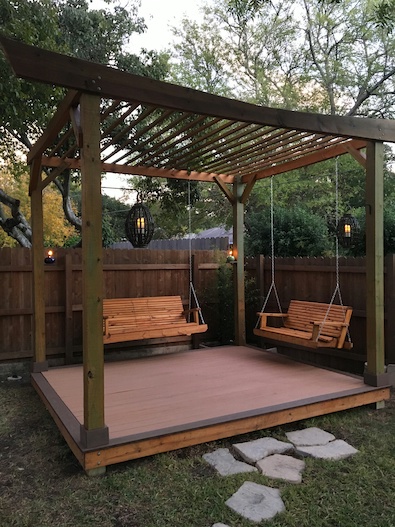
This is the triangular pergola Tony built from the adapted plans, in his new garden, just finished. Looking good, Tony!
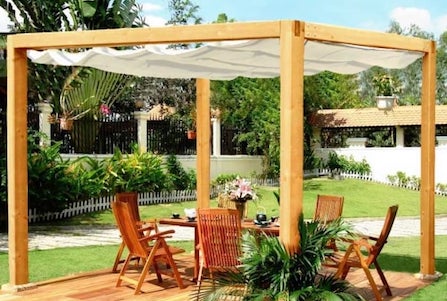
Triangular Pergola Kits
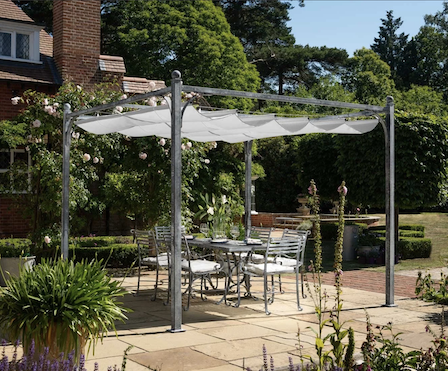
If a triangular pergola kit would be large enough and is more convenient for you, this is another way of building one in your garden.
The radial pergola isn't strictly a triangle, although it does offer slightly more room underneath.


Recent Articles
-
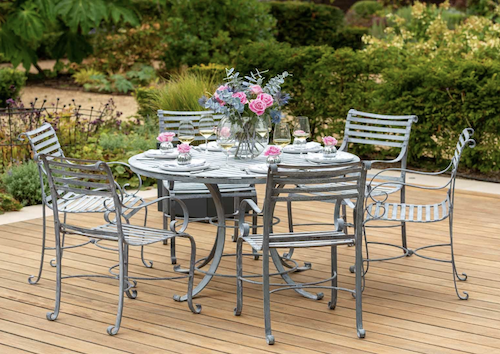
Garden Furniture Products
Apr 24, 24 11:23 AM
 Cool and contemporary or fun and funky. Ideas for using garden furniture products to enhance your outdoor living space.
 -
Fantastic Pergola Offers
Mar 06, 24 08:47 AM
 Here are the latest updated garden bargains and voucher codes. Finding fantastic pergola offers and gardening discounts can mean big savings!
 -
Pergola Swing Bench
Feb 17, 24 08:17 AM
 Brian asked how to build an hexagonal pergola with a swing bench. Any pergola style can have a cosy and romantic hanging bench adorning its rafters. Get ideas here....
 Subscribe To My Blog Posts


Advertising Links
This page may contain advertising links earning a small commission, at no cost to you. It is my hope these links will help you to make informed and creative choices.
Love Gardening! Ezine
Join the 'Love Gardening!' Ezine and receive garden and landscaping tips, exclusive voucher codes and updates to the website. More...
Recently Released

Pitched Roof Hexagonal Pergola
Other
Pergola Plans

Free Simple Pergola Plans

Attached Lean-to Pergola

Free Raised Bed Plans

Corner Pergola

Hexagonal Pergola

Asian Pergola

Seated Arbour
"The plans were great, very concise, easy to follow and I couldn't have managed without them!" T.
“Well done for a really useful site!” Mike.
Love the templates for the Rafter Tails! Using Design #5. Thanks so much." Laura.
"I love your website! Your entire site is incredible. I was able to get ideas for my pergola, which looks fantastic." Wayne.
Great service. Now all I have to do is build it! Martin.
"Your plans look amazingly comprehensive. I see you are intending putting the plans for the corner pergola on this fabulous site. Could you please tell me when the corner pergola plans will be available to purchase...yours is the nicest design I have seen!" Michelle.
Plants and Seeds
Pergola Kits and Accessories


Grow Your Own


Sales & Offers
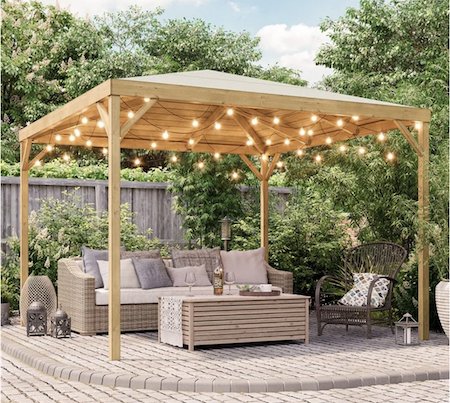
Beautiful 'Gainsborough' gazebo
Save £204!


See the 'Fantastic Offers' page for more bargains on pergola kits, tools and all things gardening!