Pergola Tools and Materials
On the pergola tools and materials list - the links are listed below and also contained within the plans - tick off the tools and materials you already have and those you need to either borrow or buy. Borrowing tools can be very helpful but remember to return them in their original state or you might ruin a beautiful friendship! It has been known!
If this is one of your first journeys into DIY, and you think you would like to do more in the future, it is worth investing in some good basic tools. I have built up a toolbox over the years and it's surprising how quickly you gather together all the things you need for most jobs - one anniversary present from my husband was a kango (a heavy duty tool for breaking concrete)!
Do check out the Fantastic Offers Page first, as I list many bargains on both tools and materials there.
Included below are some 'Important Notes', which give links to places where you can source items locally. These notes also give suggestions on which tools are best for a range of jobs, which materials to use etc. and safety issues - no, you mustn't build this pergola in your slippers. This has also been known to happen!
Either way, there should be no problems finding the what you need.
How to Use the Tools and Materials Lists
1 Decide which pergola you wish to make:
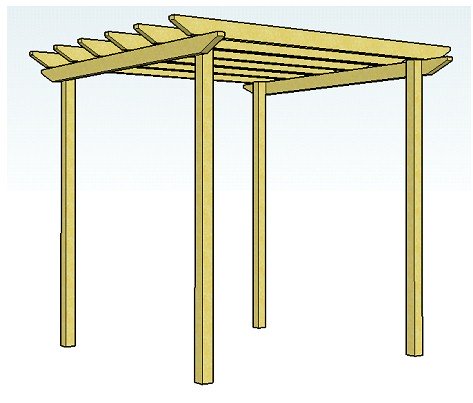
A freestanding wooden pergola with conventional notched rafters.
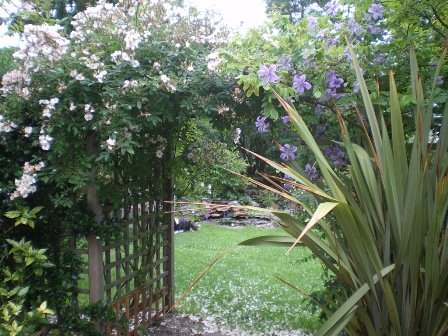
Here you can see how the pergola can be adapted in any way you choose, and how it will look when it's finished, with the addition of trellis.
 |
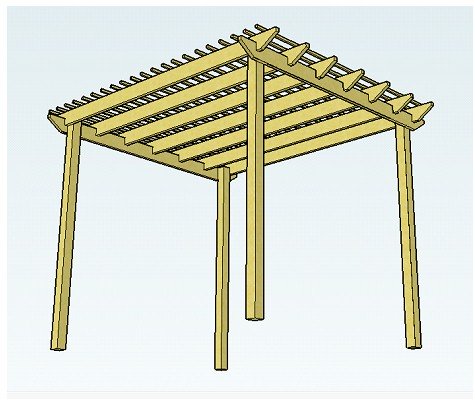 |
There is very little notching with these plans and they are super-quick to build.
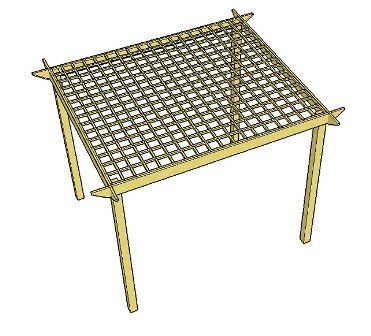
Design 1 uses trellis instead of internal rafters.
Design 2 uses un-notched rafters.
2 Print the relevant lists
Put them in a folder with the pergola plans and the rafter tail end template of your choice.
- Free Pergola Plans Tools and Materials List
- Simple Pergola Design 1 Tools and Materials List
- Simple Pergola Design 2 Tools and Materials List
You can find a ready-made rafter tail template - here
3 Take A Look At 'Adapting The Plans'
Check here to see if there are any adjustments you would like, or need, to make.
4 Read the ‘Important Notes’ below.
These will give you a good idea of the tools and materials available with pointers in the right direction.
5 Make A Note Of What You Already Have
Tick off any items that you have or can borrow on both the tools and materials list.
6 Decide What You Need For Your Project
Which items you need, or wish, to buy?
7 Options For Buying Tools and Materials
Buying online:
1) Click on the relevant tools and materials list for your plans - either for the free plans or for the additional plans - and print it out if you wish.
2) Enter the item name in the search box at the online store. The link to this is provided on each list.
There may be several choices of make, model, style and design for you to choose from in a range of prices.
Buying from a local DIY store or local specialist store:
Find a store near you from your local directory:
Find a:
- Timber yard
- Builders merchant
- Agricultural and commodities supplier
- DIY store
- Mixture of the above
- Tool hire
The best option is usually a local timber/wood yard, where they can help you with any questions you may have. They will stock the right fixings, too. Prices may also be cheaper than buying from a DIY store.
You can phone to check that they have the items in stock.
For more pricy items, it may be worth hiring these for a few days, although if you would like to try your hand at further projects, it might be worth the initial outlay.
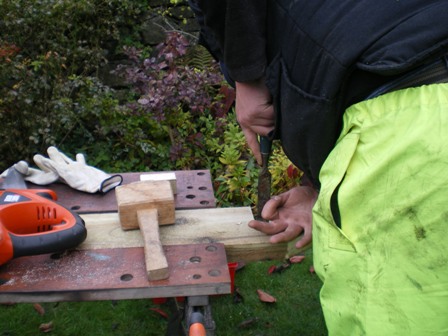
Important Notes: Tools
Power Tools V. Hand Tools:
You could build the pergola using simple hand tools, but it will save a lot of time and effort if you use powered tools.
Especially useful is an electric drill – either corded or cordless.
One of my favourite tools is my reciprocating saw. It saves a lot of time and effort cutting the rafters. They come in both mains and cordless, but the mains-powered is preferable, as the batteries soon run down with the cordless saw. You might also use a circular saw, depending on your experience. The cordless circular saws are excellent for this type of project.
Cordless V. Corded Tools:
Cordless tools are great because you can use them anywhere, and there are no cords to get in the way. Many jobs can be done with a cordless tool.
For more heavy-duty jobs, a corded tool is handy because they are more powerful, especially when using the hammer drill action for jobs like drilling masonry.
Chuck with a Key V. Keyless Chuck:
The chuck is the part at the end where the drill bit or screwdriver bit fits. I go for a keyless chuck every time. It saves hunting for the key, and the drill and screwdriver bits are easier to change. However, over time, a keyless chuck may lose its grip a little.
Tip – if you buy a drill with a chuck and key, tie the key around the cord, a little way from the drill and hopefully that way you won’t lose it!
My Recommendations:
Use a power tool if it is going to save you a significant amount of time and energy. Many people have said that the drill/driver sets, reciprocating saw and the cordless circular saw were their best investments.
If possible have a cordless drill and a corded drill; the first for general use, and the second for more heavy-duty jobs.
When doing a job where you need to keep changing the drill bits and screwdriver bits, use the corded drill to drill holes and the cordless drill to screw in. It saves a great deal of time changing the drill bits and screwdriver bits!
Safety:
Always take great care when using power tools.
Wear appropriate clothing and footwear.
Don’t use in the damp or rain.
Use a circuit breaker where you plug the tool in.
Keep children and pets well away from the work area.
Concentrate! – stop for a break regularly and don’t work when you are feeling tired.
Important Notes: Materials

Using concrete to put the posts in:
If you would prefer to put your posts in with concrete, go to Adapting the Plans for futher detailed information.
Only use Metposts/post anchors if your ground is fairly pliable and stone free. Otherwise use concrete-in post anchors.
Length of wood:
The length of the rafters will depend on how wide and deep you wish to make your pergola. You can easily estimate the lengths you will need.
Measure, on the ground, how wide you want your entrance to be – let’s say 6’. Add 18” for the rafter tail ends, which gives you 7’ 6”, so you should easily be able to get each rafter out of a 8’ plank.
If you want to build the pergola more or less according to the plans, then you will need 8 planks of wood at 8’(3.200m) long.
Avoid extending the width, or depth, of your pergola to over 6’, with only 4 posts, and at maximum 10'. To extend the length or depth of your pergola to more than 6’ go to Adapting the Plans
Pre-cut Rafter Tail Ends
If you would like to make your own pergola rather than buy a kit either because of size considerations, wanting to build a unique structure, or just because you love the creative process, that's great! However, I frequently receive requests for pre-cut pergola rafters.
Cutting your own rafter tail ends is fairly straightforward if you have a jig-saw and if the wood is not too thick. Some people are keen to build their own pergola, but find cutting the tail ends less easy. It's only recently these pre-cut rafters have come onto the market. The curves have already been cut and the wood is planed, giving it an attractive, smooth finish.
There is obviously a demand for them, so here are some excellent options:
Coming in six different rafter tail end designs, we have pre-cut 4" x 2" rafters in, amazingly, six different lengths: from 1.2m all the way up to 6m, making these an incredibly versatile option.
Cut at one or both ends means you are able to use them:
- For a stand- alone pergola of more or less any size or
- For an attached lean-to pergola cut at only one end
Here they are:

This next one measures approx 8ft x 3.5" x 1.5" - only the one size, so a little less choice - but is ideal if that is the size you need.

Either way, there are options now and having a choice mostly makes life easier!
Type of wood:
You can use any type or colour of wood but it must be tanalised/ pressure treated to stop it from rotting. (The pergola I built in my garden has lasted for 20 years and is still going strong). Use a cut end preserver to protect against the effects of weathering. You can paint this onto the cut ends before you attach the rafter to the structure, or do it afterwards.
Un-planed wood fits into Metposts exactly. If you would prefer a smooth ‘finish’ to the wood, it will have to be ‘planed’. However, this has a marked effect on the finished size and therefore will be too small to fit into the Metposts. For ‘planed’ wood, I would suggest using spacers to pack out the space between the wood and the Metpost.
If you wish to give your pergola a more ‘chunky’ feel, using thicker wood or would like to use planed wood go to Adapting the Plans
Trellis panels:
The use of diamond trellis panels or square trellis panels is optional. You don’t need to have any or you could have 2 or 3. You would have 3 if you wanted to sit under the pergola, where it would act as a shady retreat, such as a seating area.
To learn more about how to do this visit Adapting the Plans
The height of the trellis panel will usually be 6’. As the panels usually come in widths of so many feet, you would generally go for a 4’, 5’ or 6’ wide panel.
Buying wood:
It's not necessary but handy to buy your wood from the same place if you can, whether it is off the Internet or from a local supplier. Sometimes this is not possible, so a bit of hunting around is needed.
All Set?
Now you have your tools and materials, you're ready to go!
Recent Articles
-
Fantastic Pergola Offers
Mar 06, 24 08:47 AM
 Here are the latest updated garden bargains and voucher codes. Finding fantastic pergola offers and gardening discounts can mean big savings!
 -
Pergola Swing Bench
Feb 17, 24 08:17 AM
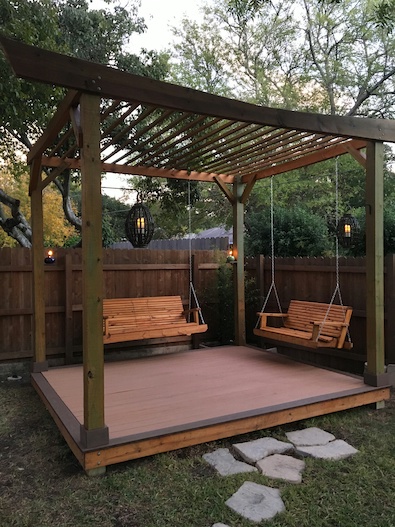 Brian asked how to build an hexagonal pergola with a swing bench. Any pergola style can have a cosy and romantic hanging bench adorning its rafters. Get ideas here....
 -
Alan's Patio Pergola
Aug 30, 23 08:56 AM
 We wanted a more shady place on our patio, so with the help of your plans we amalgamted a few of the designs and built this. All made from green oak,
 Subscribe To My Blog Posts


Advertising Links
This page may contain advertising links earning a small commission, at no cost to you. It is my hope these links will help you to make informed and creative choices.
Love Gardening! Ezine
Join the 'Love Gardening!' Ezine and receive garden and landscaping tips, exclusive voucher codes and updates to the website. More...
Recently Released

Pitched Roof Hexagonal Pergola
Other
Pergola Plans
Free Simple Pergola Plans

Attached Lean-to Pergola

Free Raised Bed Plans

Corner Pergola

Hexagonal Pergola

Asian Pergola

Seated Arbour
"The plans were great, very concise, easy to follow and I couldn't have managed without them!" T.
“Well done for a really useful site!” Mike.
Love the templates for the Rafter Tails! Using Design #5. Thanks so much." Laura.
"I love your website! Your entire site is incredible. I was able to get ideas for my pergola, which looks fantastic." Wayne.
Great service. Now all I have to do is build it! Martin.
"Your plans look amazingly comprehensive. I see you are intending putting the plans for the corner pergola on this fabulous site. Could you please tell me when the corner pergola plans will be available to purchase...yours is the nicest design I have seen!" Michelle.
Plants and Seeds
Pergola Kits and Accessories


Grow Your Own
Sales & Offers
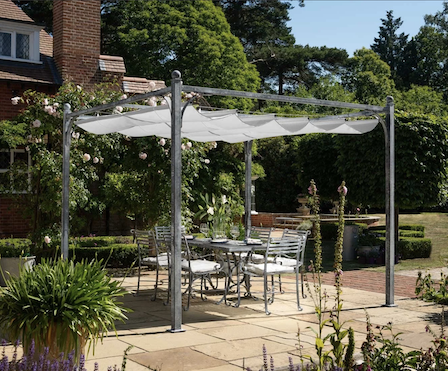
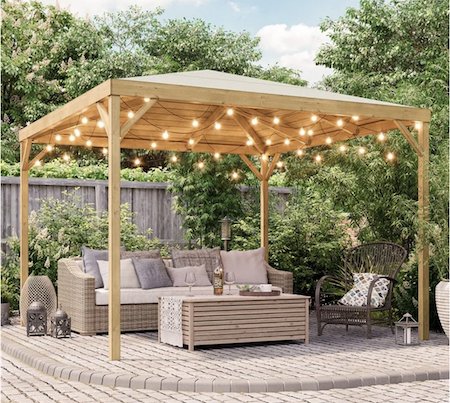
Beautiful 'Gainsborough' gazebo
Save £300!


See the 'Fantastic Offers' page for more bargains on pergola kits, tools and all things gardening!