Attach a Pergola Ledger Board Over a Window

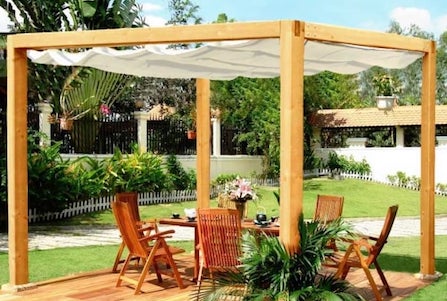
In Pam and Brian's pergola above, we can see how to attach a pergola ledger board over a window frame to support the rafters. It looks so inviting, doesn't it? This is an ideal way of creating an outdoor room attached to the house, but is not so easy for those who have little or no space to fix a ledger board below the overhanging soffits, fascias or roof line.
How on earth can we fix the ledger when the line is broken by the window?
Craig, Sue, Bob, Dev and Phil have all been trying to find the solution to this same problem in only the last few weeks! There is a way around it, fortunately, and one which keeps the open space in the centre. Bonus!
We need to think outside the box and be creative.
Firstly, there is the easy way and the complicated way.
But first of all what is high enough?
I would recommend for a standard size house 8ft - 10ft, as long as it isn't within 2m (6ft 7") of a boundary. Attached lean-to pergola kits are generally around 8ft - 9ft.
Some pergolas are as low as 7ft 6", which is ok, as long as you remember to take into account the height of the rafters dropping lower than the height of the top of the posts. So, if our posts are 7ft 6" then the real height of the pergola will be this height, 7ft 6", less the height of the rafter, say 6", giving a real height of 7ft. That's 1ft taller than a 6ft person. Is that going to be tall enough?
Anyway, if it isn't, let's take a look at the more complicated way first.
This may involve removing the tiles, fascia and soffits, attaching a metal angled bracket (as opposed to an 'angle bracket') to the SIDE of the house rafters (never the ends, as the structure wouldn't be strong enough to take the weight), and protruding through the fascia, to hold the ledger board, and then reinstalling all of the materials.
This is for a more advanced solution, or options to have a contractor come to fit the pergola for you. Here is a video showing various options for installing the ledger underneath the soffit (easiest solution) or for raising the ledger board higher than the soffits.
If you feel that you can manage this, you can attach a pergola ledger board to your house above the height of the window, either sitting in front of the fascia or just above the tiles.
Like most people, you are probably looking for an easier solution! This one is just that, and the adjustments are really quite straightforward.
I usually suggest having the rafters running in the opposite direction to normal, with the side rafters acting as the main support rafters and spanning from the ledger to the posts, with the decorative rafters running parallel to the house. Let's see what the difference is, and what each looks like.
The pergola, shown below, made from the lean-to pergola plans, has the rafters running from the ledger board, attached to the house, to the main rafter, supported by the posts. Notice how there is ample room for the ledger board between the window and soffits/fascia. This is the way that the pergola would normally be built.

Now let's take a look at a pergola kit that has the rafters running in the same direction as the wall (parallel to it). We can see clearly how they attach a pergola ledger to their wall. Of course, there is no window to consider...and the pergola kit isn't very long.
Most of us building a pergola over a window have a longer stretch than the one shown. Your pergola will probably look very different to the one below but the principle is the same.
(Just as an aside, when I make the ledger board, I like to make it to match the rafter tail ends, rather than cutting it off level with the posts, as you can see on the pergola kit below. By making the ledger look like a rafter, there is a seemless run from front to back. It will sit slightly lower than the other rafters.)

Attach a Pergola Ledger Over a Window
This is where we need to get creative!
We're going to have two shorter ledger boards each side of the window. These are going to support the side rafters, which, in this case, are the main support rafters. The raised rafters, running from front to back, are going to sit on these.

Often, the length of the beam span, from one outside post to the other, is too long. Many people, who want to build their own attached pergola, contact me to ask if they can have a span of anything between 15ft - 25ft without extra support posts. It's the desire to have the uninterrupted view which is so enticing, and I fully understand. However, it is more than likely that, over time, the main supporting rafter will sag, especially if there is the added weight of a vigorous climber. It's definitely better to err on the side of caution.
If we take a look at the 2D diagram, we can see the two extra inside side rafters running from the ledgerboard to the inside posts. These give strength to the structure, making it much more stable and able to take greater weight. An added bonus is that the 8ft space in the centre gives an uninterrupted view through the window.
Bob's Pergola
I have taken Bob's pergola as an example because he has relatively easy dimensions to work with. Bob had an existing pergola that had collapsed under the weight of the climbers, the original bracket above the window being too weak to hold the structure. He needed to replace the pergola, in order to have a shaded area protected from the sun.
I wish to build a lean to pergola but have a fundamental problem which is I am in a bungalow and in the middle of where the main support attached to the house would go I have a large 8' patio door which goes right up to the soffits. I would be looking at a length of 5 metres by a width of 3.2 metres, the door falling in the 5 metre run. I have wall available either side of the door. Any ideas?
Bob
Notice how Bob changes from imperial to metric measures. As I say in the plans, this often happens, and is not a problem. Just make sure that at each stage you are using one or the other.
So, 8ft is 2.4m , with a 1.25m ledger each side, that makes up, approximately, the 5m span (with a little jiggery pockery!).
Here is a similar beam span in 3D. (The main supporting side rafters are not shown, only the posts and the front decorative rafter.)

Why not attach trellis? It can give a really enclosed and cosy feel to this type of outdoor room, provide a little more shade and is a great excuse for growing some fabulous climbing plants!

I prefer a raised rafter on this type of pergola. The rafters can be fixed on top for fully un-notched rafters, too.
Here we can see the different look each style gives.
 Raised Rafters |
 Un-notched Rafters |
The advantages of building your pergola this way is that everything is supported really well...and you get a room with a view, too.
Best of both worlds, really!
Don't forget those gorgeous climbing plants. They make all the difference.

Good luck to all who have emailed about this style of pergola. Make sure to send a photo when you've finished...if you have built your own pergola, or if you have made one from a kit. I love to see what you have achieved.
The easiest way send your photo is by uploading it in the form below.
Just send it on its own (you can send up to four)...or if you feel like writing a bit, that would be great. Just give your photo a name and away you go.
Your Pergola Story
Write it here!
It's great to tell others of our achievements; the pride we feel, and how it has made a difference to our lives.
Be an inspiration to others who are thinking of building their own pergola.
Help them to have the confidence to take the bull by the horns and give it a try. It's often all that is needed to inspire someone. After all, you have been there and done it.
Tell your story. We would all love to hear it!
I hope this has helped you to think about how to attach a pergola ledger in the easiest possible way.
Enjoy your outdoor room this summer. It's a very special time!
Recent Articles
-
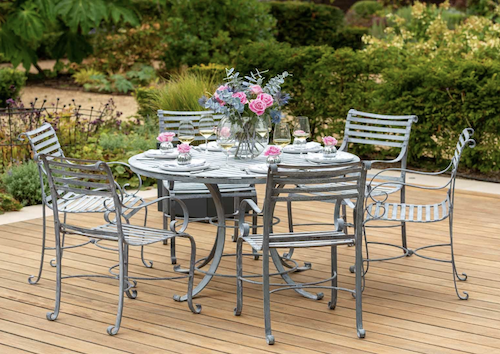
Garden Furniture Products
Apr 24, 24 11:23 AM
 Cool and contemporary or fun and funky. Ideas for using garden furniture products to enhance your outdoor living space.
 -
Fantastic Pergola Offers
Mar 06, 24 08:47 AM
 Here are the latest updated garden bargains and voucher codes. Finding fantastic pergola offers and gardening discounts can mean big savings!
 -
Pergola Swing Bench
Feb 17, 24 08:17 AM
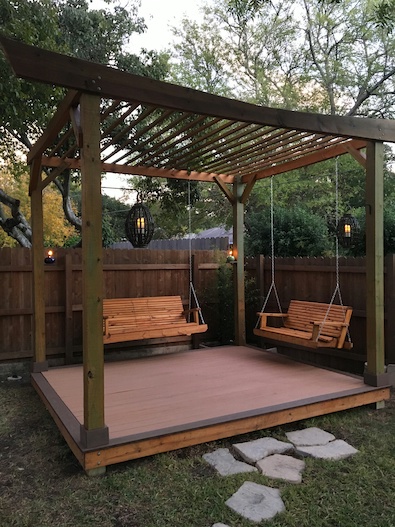 Brian asked how to build an hexagonal pergola with a swing bench. Any pergola style can have a cosy and romantic hanging bench adorning its rafters. Get ideas here....
 Subscribe To My Blog Posts


Advertising Links
This page may contain advertising links earning a small commission, at no cost to you. It is my hope these links will help you to make informed and creative choices.
Love Gardening! Ezine
Join the 'Love Gardening!' Ezine and receive garden and landscaping tips, exclusive voucher codes and updates to the website. More...
Recently Released

Pitched Roof Hexagonal Pergola
Other
Pergola Plans

Free Simple Pergola Plans

Attached Lean-to Pergola

Free Raised Bed Plans

Corner Pergola

Hexagonal Pergola

Asian Pergola

Seated Arbour
"The plans were great, very concise, easy to follow and I couldn't have managed without them!" T.
“Well done for a really useful site!” Mike.
Love the templates for the Rafter Tails! Using Design #5. Thanks so much." Laura.
"I love your website! Your entire site is incredible. I was able to get ideas for my pergola, which looks fantastic." Wayne.
Great service. Now all I have to do is build it! Martin.
"Your plans look amazingly comprehensive. I see you are intending putting the plans for the corner pergola on this fabulous site. Could you please tell me when the corner pergola plans will be available to purchase...yours is the nicest design I have seen!" Michelle.
Plants and Seeds
Pergola Kits and Accessories


Grow Your Own

Sales & Offers
Beautiful 'Gainsborough' gazebo
Save £204!


See the 'Fantastic Offers' page for more bargains on pergola kits, tools and all things gardening!